How to make gorgeous, fruit-flavored, homemade lollipops!

This post may contain affiliate links. Please see my full disclosure policy for details.
My daughter is one of my biggest baking inspirations so I am always trying to create special treats for her that are not only unique, but magical! She loves everything pink, sparkly, and fairy tale related so I try to incorporate those features when making her treats. So for her 6th birthday, I wanted to make her a winter wonderland cake entirely from scratch, topped with dazzling lollipops! But I didn’t want to just use the typical store-bought lollipops. I wanted to personalize them myself and make them special for my daughter and her guests. So, I started out on my journey to figuring out how to make my own gorgeous Homemade Lollipops!
This was my first time making lollipops and I’ll go ahead and tell you that it can be quite challenging if you don’t have the right tools and know-how. It’s exactly because of this that I tried a test batch before starting the real lollipops, which I highly recommend for anyone who wants to try this out. I made multiple batches of lollipops, experimenting with different flavorings and colors, so I had a chance to improve my lollipop-making skills over the course of just a few batches using this recipe.
To really encompass the winter wonderland effect, I stuck several of the colorful lollipops into the top of my daughter’s winter-themed birthday cake, and then I wrapped up the remainder of the lollipops individually and left them on the front table as festive party favors. Despite being a bit hard to make at first, my homemade lollipops were a huge hit at my daughter’s 6th birthday party and more importantly, she absolutely loved them!
This lollipop recipe may seem fairly complicated at first, but after doing a few batches, it becomes much easier! Before you know it, you’ll soon start to understand the process and get the hang of making your own personalized lollipops. Inside this recipe, I have included tips on every part of the process from tips on tools to breaking down the how-to process as much as possible so you can have a bit more of a head start!


Tools for Making Homemade Lollipops
First, let’s go over the tools you will need for these homemade lollipops. Surprisingly, you don’t need a lot of tools or equipment, but there are some very specific reasons for using some of these tools that you should be aware of before diving into the process. Here’s what you need and why you need it:
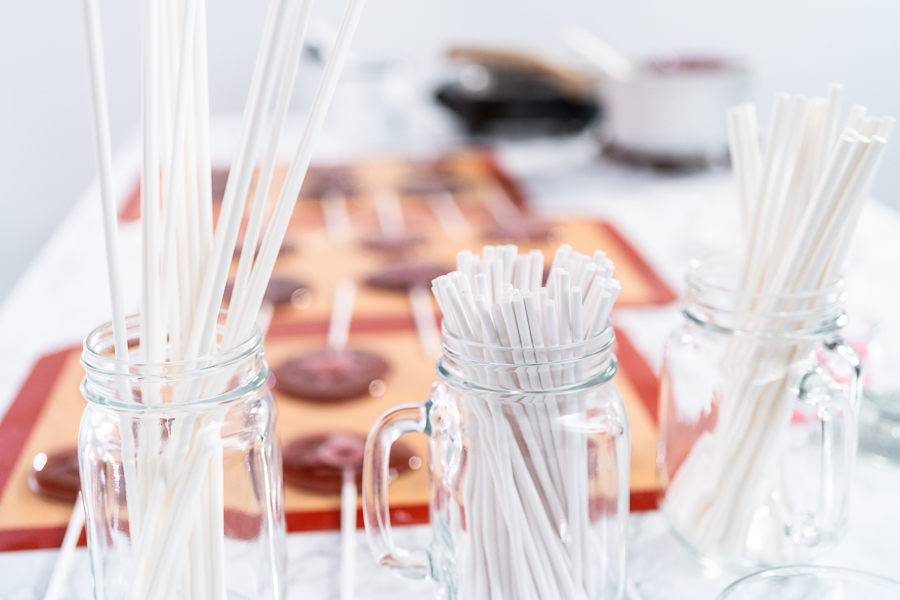
- 6-inch lollipop sticks
- 8-inch lollipop sticks
- 12-inch lollipop sticks
- Candy thermometer
- Silicone mats
- Silicone pastry brush
- Silicone spatula
- Saucepan with a pouring lip
- Snowflake cookie cutters
thermometer, I~ced it into a cup of room-temperature water, so that the sugar mixture wouldn’t harden on the thermometer or make a sticky mess when taking it out.
Equipment Tips:
- Stick with silicone mats instead of parchment paper! Using the non-stick mats allows you to easily peel the finished lollipops off the mat directly, without having to grease the mat beforehand. You should also be aware that there is a specific way to peel off the lollipops to ensure that they don’t break during that step, but we’ll get to that later.
- I specifically used a special saucepan with a pouring lip so that I could directly control how much lollipop mixture would be coming out of the pan. Trying to use a spoon for this is more difficult since you have to use your hands for two different things, instead of just using both hands on the saucepan to control the mixture.
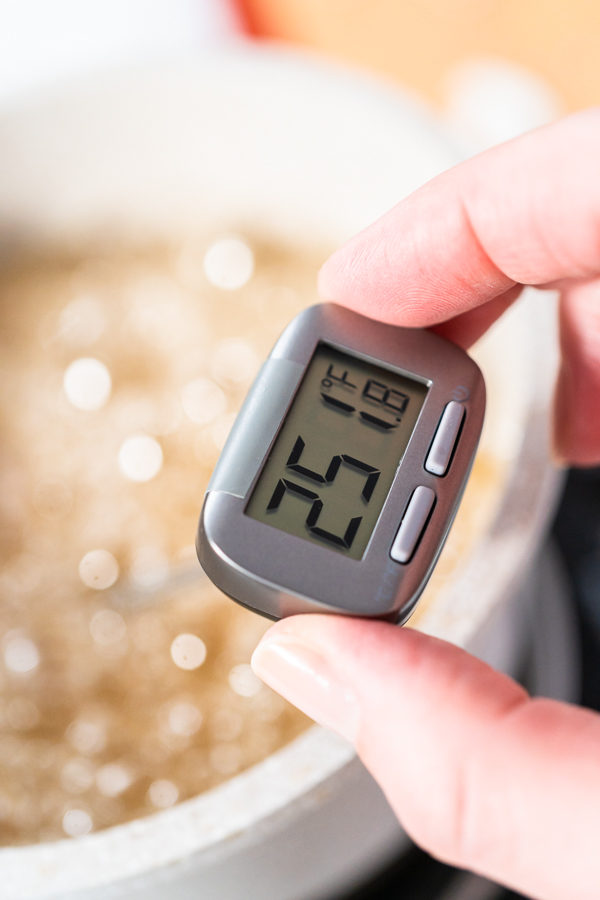
- When preparing the lollipop mixture, I used a candy thermometer to accurately find the temperature of the mixture so that the sugar wouldn’t caramelize. If that were to happen, it would ruin the entire batch! While using this thermometer, I always kept it in a cup of room-temperature water, so that the sugar mixture wouldn’t harden on the thermometer or make a sticky mess when taking it out from the mixture.


Sweet and Simple Lollipop Ingredients
Next, let’s go over the lollipop ingredients. You actually won’t need a lot here either as the ingredient list is surprisingly short and simple. Just a few simple ingredients and you’ll be well on your way to making majestic lollipops!
Lollipop Ingredients:
- 3 Cups Sugar
- ¾ Cup Water
- ½ Cup Corn Syrup
- 2 tsp Lemon Extract or another flavoring
- 1 tsp Vanilla Extract
Garnishes:
Ingredient Substitution:
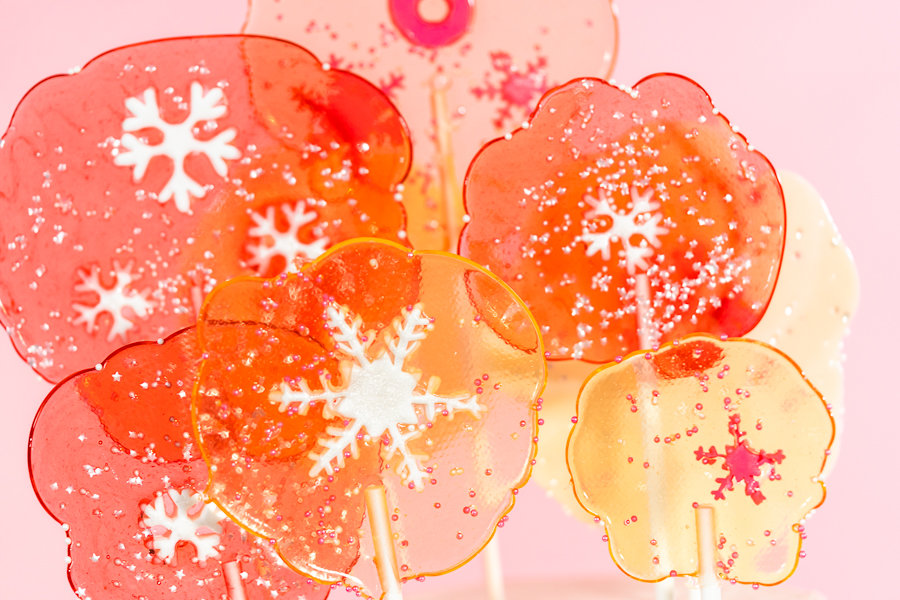
I used artificial extracts for the sake of saving time but you can use natural, fresh fruit-flavorings if you have more time to work with. By using the fruit extracts to both color and flavor these lollipops, it not only cuts down on ingredients, but also simplifies the recipe and helps to make a much tastier lollipop. In this recipe, the pink lollipops are strawberry-flavored and the clear one’s are lemon.

How to Make Charming Homemade Lollipops
Now it’s time to get down to the nitty-gritty of the process. I have broken these steps down as much as possible for you to try to help simplify the process and save you some hassle. Even so, you’re going to be much better off by practicing the recipe and making a few test batches to start with. Make sure to completely read through the steps and the following process tips I have included before starting the process yourself.
Lollipop Decoration Prep:
Before making the lollipop candy, use small snowflake cookie cutters to cut out several tiny snowflake decorations from the white fondant and pink fondant. These will be in the middle of the lollipops.

Making Homemade Lollipops:
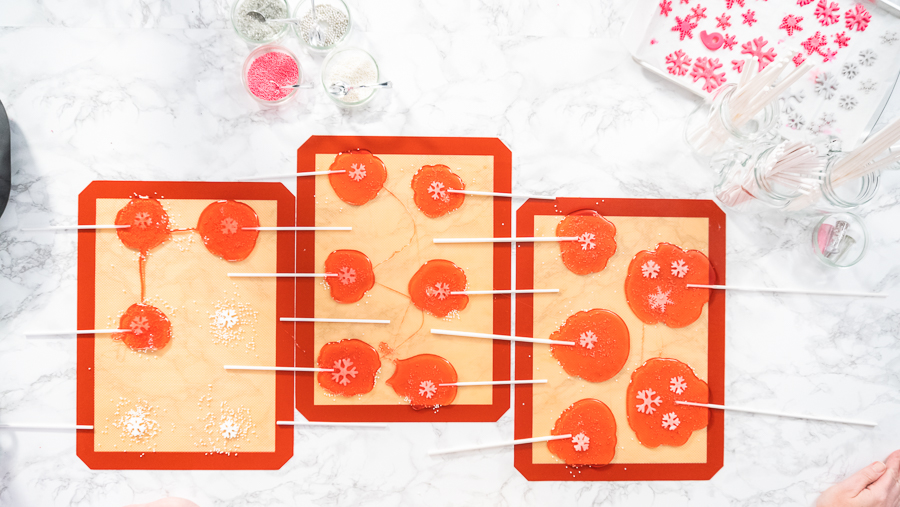
- First, set out 3 large silicone mats onto a completely flat surface.
- Next, spread the lollipop sticks over the mats and place the snowflake fondant decorations face down, either individually or in small groups, above the sticks where the candy will go. Leave enough space between them to form full lollipops that won’t run into each other.
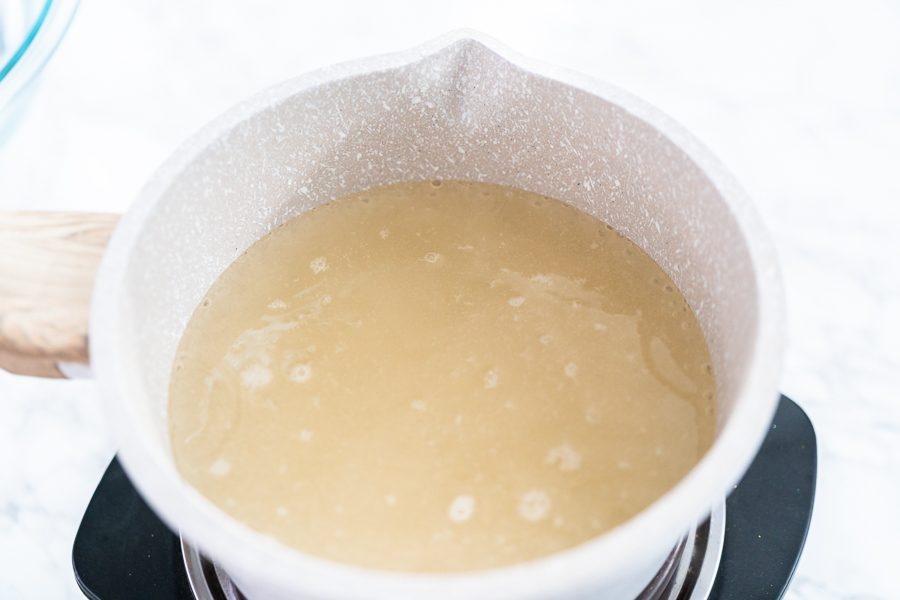
- Then, pour the sugar, water, and corn syrup into a medium saucepan over medium heat.
- Gently stir with a silicone spatula until the mixture comes to a boil, making sure not to splash the mixture up the sides of the saucepan.
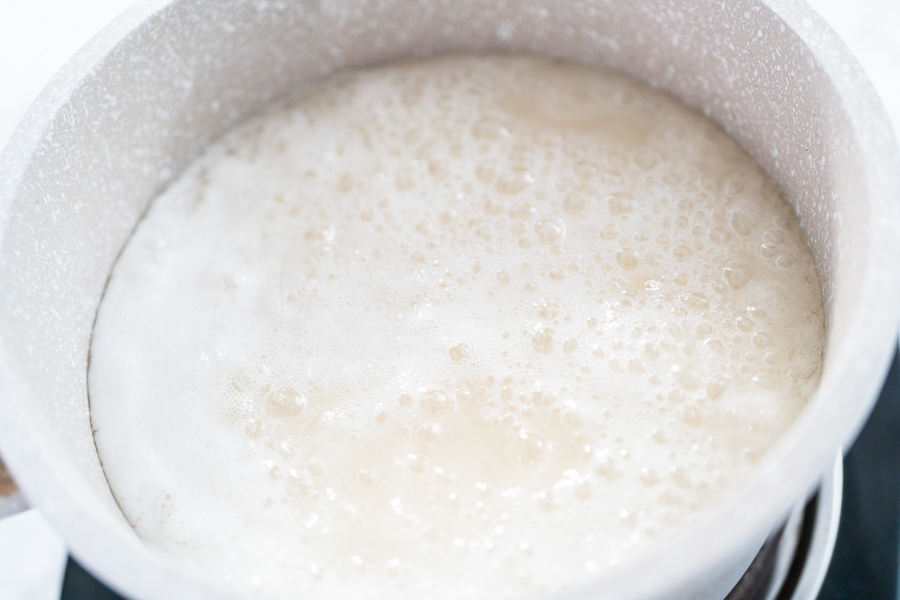
- Once the mixture is boiling, immediately stop stirring and do not stir again for the rest of the cooking. Use a silicone brush moistened with warm water to wipe down the sides of the saucepan to wash away any forming crystals.
- With a candy thermometer, check the temperature of the lollipop mixture. When the candy mixture reaches 300F, remove the saucepan from the heat and put the bottom of the hot pan into a tub of room-temperature water for 30 seconds.
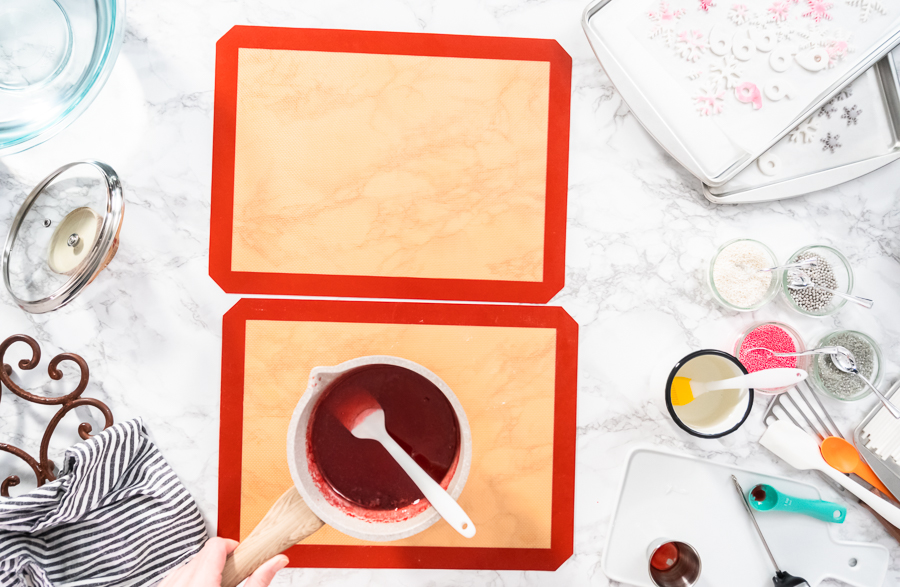
- Then, pour the desired flavor extracts and food coloring into the candy mixture in the saucepan.
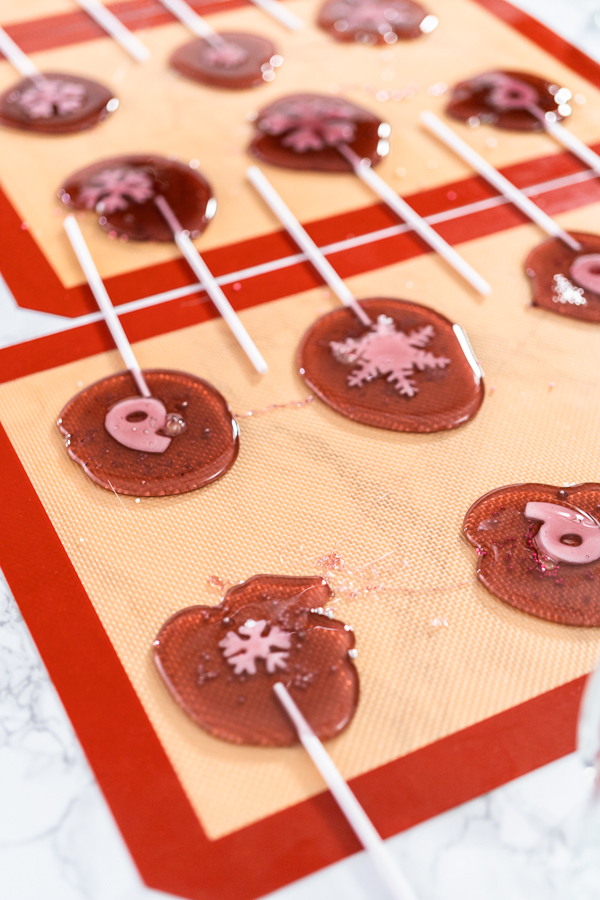
- Next, very carefully pour the candy mixture on top of the snowflake fondant decorations, and over part of the lollipop sticks, to make the lollipop shapes.
- Do this in groups of 3, following up immediately with the next step.
- Then, immediately top the freshly poured candy with sugar pearls and edible glitter stars if desired, and spin each lollipop stick so it is completely covered in the sticky candy.
- Repeat this process with the remaining candy, doing 3 at a time.
- Finally, let the lollipops harden at room temperature for 20 minutes before serving!
To remove lollipops: When removing each lollipop, you can both lift the candy part of the lollipop off and peel the silicone mat at the same time, for a nice clean removal without any breaks. If you try to peel off the lollipop using the stick, the lollipop will most likely just break right off of the stick.
More Christmas Recipes
Process Tips:
- When putting in the fondant decorations in my test batches, I tried multiple ways to get the best-looking lollipop. At the beginning, I tried pouring the candy onto the mat first, then stuck the decorations and lollipop sticks on top of the hot lollipop mixture. While this may seem like the best way to do it, it was not! If you pour the mixture first, then add the decorations and sticks, you may find that the lollipop mixture cools way too quickly for you to place down your decorations and sticks in time before the candy starts to harden.
- I found that by placing down the fondant decorations face-down on the mat first and then pouring the lollipop mixture over the decorations is far easier and much more effective. Doing it in this order lets you have the decorations already positioned and ready for the lollipop mixture, so you don’t have to race the clock so much.
- If you feel like your lollipop mixture is becoming too hard to pour, it is best to leave it be and start on another batch. I know that can be disheartening to hear, but if you try to re-heat the mixture, the color will become cloudy, which isn’t good at all if you’re aiming for picture-perfect lollipops like I was. You need to be able to act quickly when pouring the lollipops, which is another reason it’s best to have your decorations already in place.

Storing Homemade Lollipops
To store homemade lollipops, they can easily be wrapped up individually in party favor bags for travel or for storage. You can also store multiple lollipops together in an airtight container with layers of wax paper in between. Store the hard candy lollipops in a cool, dry place, but do not refrigerate them unless you live in a hot, humid environment. Properly stored, these lollipops will last for about 12 months at room temperature. Always remember to label the date on the outside of the container to keep up with freshness.

Sweet Serving Ideas
Want to see these beauties in action? Then check out the whole Winter-themed Funfetti Cake with Lollipops that I made for my daughter’s birthday! But the fun doesn’t have to stop there, these lollipops are perfect for other holidays, events, special occasions, or just for a fun treat to enjoy anytime!
Try these Homemade Lollipops out with other colors, fruit flavors, and fondant decorations for occasions and treats such as:
- Birthday cakes
- Birthday or Holiday Party Favors
- Christmas
- New Year’s
- Valentine’s Day
- Mother’s Day or Father’s Day
- 4th of July
- Halloween
- Wrap these up and send them with the kids for school holiday parties
- Ice skating practices or competitions
Want more homemade cake toppers and charming cupcake toppers? Here are some recipes for every season:,
- Toasted Pecans
- Toasted Coconut Flakes
- Homemade Mini Chocolate Bars
- Mini Chocolate Bars with Sprinkles
- Mini Mermaid Chocolate Bars
- Chocolate Mermaid Tails
- Homemade Star-Shaped Chocolates
- Chocolate Hearts and Lips
- Chocolate Seashells
- Sugared Cranberries
- Sugared Cranberries and Rosemary

Homemade Lollipops
Equipment
Ingredients
- 3 Cups Sugar
- ¾ Cup Water
- ½ Cup Corn Syrup
- 2 tsp Lemon Extract or another flavoring
- 1 tsp Vanilla Extract
Instructions
- First, set out 3 large silicone mats onto a completely flat surface.
- Next, spread the lollipop sticks over the mats and place the snowflake fondant decorations face down, either individually or in small groups, above the sticks where the candy will go. Leave enough space between them to form full lollipops that won’t run into each other.
- Then, pour the sugar, water, and corn syrup into a medium saucepan over medium heat.
- Gently stir with a silicone spatula until the mixture comes to a boil, making sure not to splash the mixture up the sides of the saucepan.
- Once the mixture is boiling, immediately stop stirring and do not stir again for the rest of the cooking. Use a silicone brush moistened with warm water to wipe down the sides of the saucepan to wash away any forming crystals.
- With a candy thermometer, check the temperature of the lollipop mixture. When the candy mixture reaches 300F, remove the saucepan from the heat and put the bottom of the hot pan into a tub of room-temperature water for 30 seconds.
- Then, pour the desired flavor extracts and food coloring into the candy mixture in the saucepan.
- Next, very carefully pour the candy mixture on top of the snowflake fondant decorations, and over part of the lollipop sticks, to make the lollipop shapes. Do this in groups of 3, following up immediately with the next step.
- Then, immediately top the freshly poured candy with sugar pearls and edible glitter stars if desired, and spin each lollipop stick so it is completely covered in the sticky candy.
- Repeat this process with the remaining candy, doing 3 at a time.
- Finally, let the lollipops harden at room temperature for 20 minutes before serving!


Notes
- When putting in the fondant decorations in my test batches, I tried multiple ways to get the best-looking lollipop. At the beginning, I tried pouring the candy onto the mat first, then stuck the decorations on top of the hot lollipop mixture. While this may seem like the best way to do it, it was not! If you pour the mixture first, then place the decorations, you may find that the lollipop mixture cools way too quickly for you to place down your decorations in time.
- I found that by placing down the fondant decorations face-down on the mat first and then pouring the lollipop mixture over the decorations is far easier and much more effective. Doing it in this order lets you have the decorations already positioned and ready for the lollipop mixture, so you don’t have to race the clock so much.
- If you feel like your lollipop mixture is becoming too hard to pour, it is best to leave it be and start on another batch. I know that can be disheartening to hear, but if you try to re-heat the mixture, the color will become cloudy, which isn’t good at all if you’re aiming for picture-perfect lollipops like I was. You need to be able to act quickly when pouring the lollipops, which is another reason it’s best to have your decorations already in place.


#foodstyling#foodphotography#foodvideography#lollipop#homemade#homemadelolipop#homemadecandy#candy#birthday#kidsbirthday
Leave a Reply